After being inspired by a DIY video on youtube I couldn't help myself, I just had to try and put together a loft bed/ bunk bed for my kids. The main reason for this project was to finally, after almost 2 years, kick my 2 year old son out of my bed and our room all together! Of course this wasn't the only reason, growing up as an only child I wanted to give my kids more than I had. What better idea than to give them each other haha. I firmly believe that bunking in a room together, despite the mess that will probably sprout daily and arguments that we will all endure, will foster a better relationship and support their development. So here is a blog to celebrate sibling-hood and the fun that can come out of a uniquely designed room to cater to their needs.
Now this project had to meet a few requirements. Affordability being a principle concern. Lets be honest, why go through the trouble and time invested in building a bunk bed if you can buy one from ikea for $200+. Where I could make up for the affordability, or lack there of, would be the durability. The bed I would make had to support anything I threw at it. Ranging from the whole family cuddling up on the top bunk to read or my dumb ass hanging from its under side. It also had to be compact, in order to optimize play space, which always seems like they could use more of it. In the end, when all was said and done, it pulled out of my pocket about $400 including paint and supplies for the hanging toddler bed.
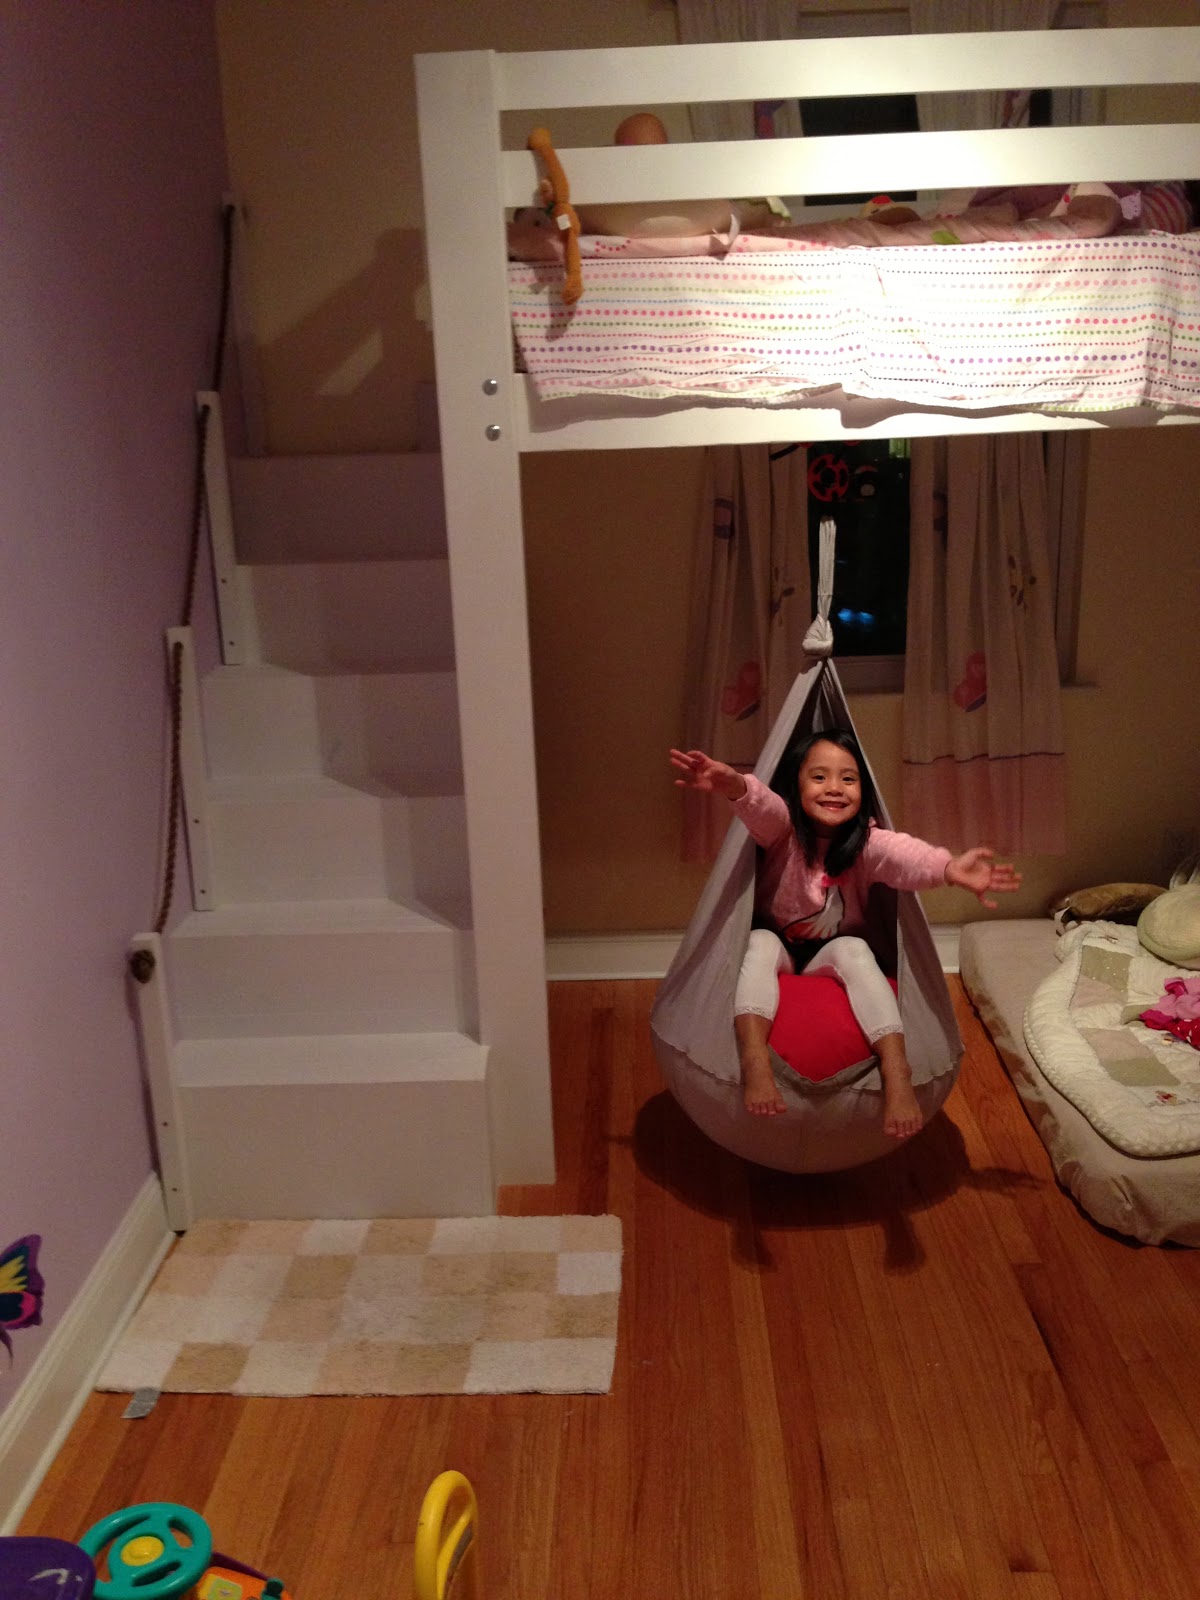
My inspiration came from a user on youtube who uploaded a diy loft bed. I basically used his idea, customized it to my rooms needs and went all out adding accessories to it. Where he just put a desk in the space underneath I added a hanging toddler bed that lifts by its chains up and out of the kids way for more space. I also added an ikea Ekorre kids seat swing. I don't recall if he did anything with the underside of the stairs but it seemed like a good functional space for a reading nook, so I left it open.
The most difficult element of this bed had to have been the stairs. I don't consider myself to be too handy, and by far this is the largest project I have yet to take on. I strongly advise to do a little extra work on the planning of the stairs and its measurements. I used a stair calculator online which helped but my difficulty was in keeping the stairs from protruding too far out into the room, this unfortunately left me with a steep staircase and shallow steps. Not exactly best for safety, so I added some rope rails which does help the kids. Enjoy the pictures and I hope at the least this inspires someone to create the room their kids deserve in any way they see fit.


The basic frame of the bed was built using 2x6's. We used a 2x6
cut out a little past the length of a twin size bed and bolted it to
the studs in the wall using lag screws. The front legs of the
frame were also 2x6's and were bolted using carriage bolts. The
cutting in the picture was of the carriage bolts, we bought them
large just to save a trip back to Home Depot.
The frame is supported on 2 sides by 2x6's bolted to studs on our walls. I made a small cut out to work around our base board heater. To support the twin bed we bolted 2x4's, using lag screws, on the inside of the frame then we later ran 2x3's across for the twin bed to actually sit on. The toddler bed, as you'll see later is actually bolted to these 2x3's and the toddler bed supports my weight with ease.


Oh the dreaded stair case! Here is a pic of the stringers, which supports the slabs of wood for the steps. Its basically a 2x12 with right angle cut outs. One piece of advice I can offer, which is probably common sense to most, is to factor into your measurements the slabs of wood you will use to cover the steps. I ended up saving by using some scrap wood for the steps. The ideal run should be 9", this is where your foot lands on the step. The rise is the face of the steps and should be 8", I ended up at about that size except I inverted the cut.

For the paint we used Behr zero voc paint. Very minimal smell that was gone within a few hours. It was a little bit more per gallon but definitely worth it for the kids room. There's plenty of info on the net about volatile organic compounds, and we are probably exposed to them enough on a regular so its nice to have the luxury of contributing to a safer environment for the kids. Since we used unfinished wood we used 2-3 coats of primer to get the finish we wanted with the white.


I ran 2x6's to cover the inside of the stair case, I plan on doing some kind of window cut outs so the kids can play, although I'm hesitant whether I want to encourage play on the stairs. You can also see the nook I left under the stairs, I will probably put a puff pillow for the reading nook there. For now its just blanket storage that we use to lay next to our sons toddler bed as we put him to sleep.

Here is the finished stair case, I will probably do another rail on the other side of the stairs for added safety. I used 2x2's cut down to 2 ft high with whole drilled through for the rope to run down. I liked the idea of a rope because it mixes up the materials in the bed and provides a different sensory experience for the kids. I also like the color contrast and its flexibility.

The construction of the toddler bed consisted of 2x4's and 2x3's again I used some scrap wood. The chains are hooked up to the frame by eye screws to the 2x3's.


 | ||
| Ikea shelf next to top bunk for water & picture frame |
Here is the finished product, we really love how the bed lifts up and out of the way, giving them the room to use the swing. The swing does hit the back wall slightly and the stair case, but I look at it in a way where it keeps them from using the swing excessively to the point where they can get hurt. As you'll see in another picture we eliminated the dresser's in the room, opening it up that much more! We neatly stuffed everything in their closet :)

The toddler bed will probably get some guard rails, and for now there is a bumper guard on the side by the wall to keep him from falling in the gap and onto the base board. In all reality the bed is not high enough from the ground to be unsafe and we keep blankets and pillows next to his bed just in case.
 |
| Inspire reading by using Ikea shelves for displaying books, makes it easier for the kids to select. |
I think projects like these are the best, they don't take long to look finished and when they do, you can continuously find ways to add accessories to it. The bed was ready to sleep on after maybe 3-4 days of work and weeks later we still find ourselves looking for ways to add to their room. Thanks for checking out the blog!!
